It feels like it has been months since the last time I created something and remembered to take pictures of the process! I mean sure I had my whole phone not being able to take photos because it was broken, but this pass weekend I got a new phone, finally, which  made it a lot easier to take photos!
It was perfect timing too! Earlier last week my boyfriend got a book for a summer class online. The company that had shipped it packaged the box with this semi-thick, brown paper. It looked perfect for practicing my drawing, so I took a bit of it and turned it into a small sketchbook!
Supplies:
Spare paper
Cardboard (Like 24-pack Can boxes)
Scissors
Embroidery Thread and needle
Reference Notebook
Step 1. What I had to do first with this was spread it out and rip the paper apart. I was lucky enough to have the paper separate like paper towels do. I then continued to fold them in half long-ways and cut it again.

Step 2. I folded it in half one more time to get it to be the perfect size for the book I wanted. Do not cut it in half at this step! At this point I stacked the paper to where the backs of the paper touched, to create a spot for a spine later on.
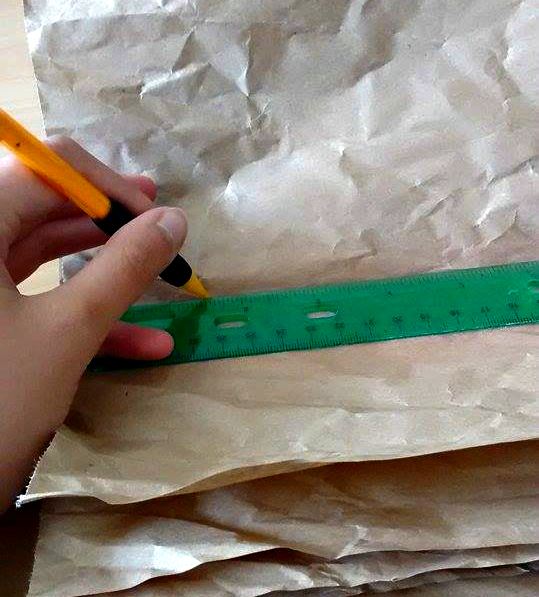
Step 3. Next I used my reference book to cut out a shape in the cardboard. I also used the reference book to trim up my paper at this point.
Step 4. After getting the cardboard folded to the way I wanted it to, I lined up the paper inside the cardboard and used a ruler to mark 4 dots inside the inner piece of paper.
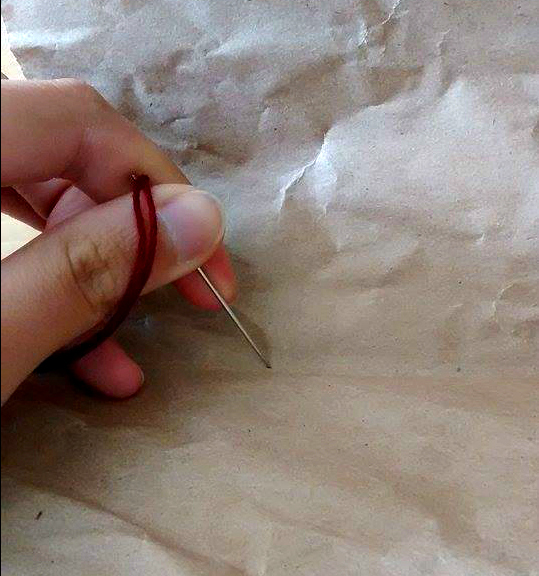
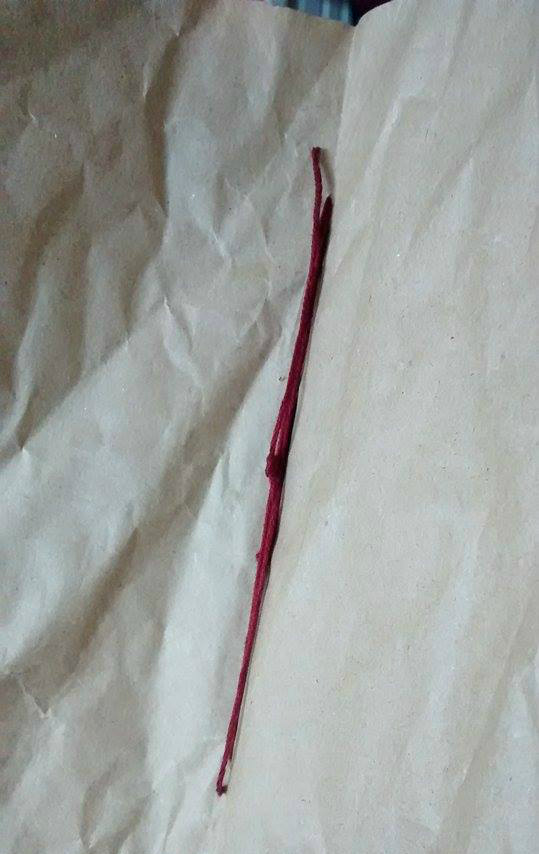
Step 5. I only needed a little over a foot of embroidery thread for this small book, so I prepped it and began sewing the spine. This was done by connecting the dots. After I was done I tied a knot so that it rested on the inside of my book.
Things I Learned:
- Not all paper is great for a book. I mean, this paper was perfect for me because I usually just sketch out my drawings with pencil and pen.
- This is a great project for spare paper you have around the house that you want to get rid of!
- It is really easy to poke yourself when you’re just beginning the spine. Be careful on this part if you ever make your own book.
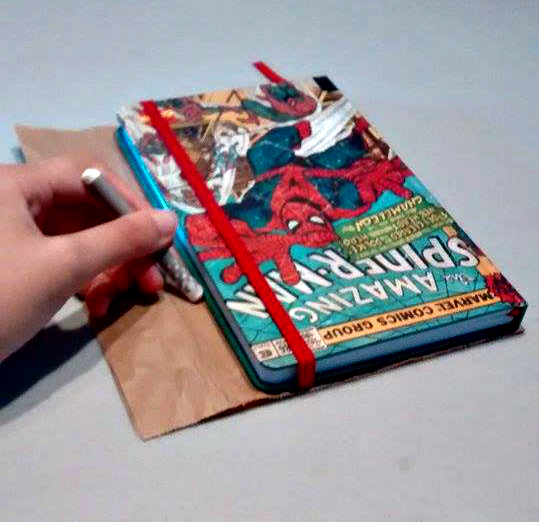
- I did not do this, but I thought I had was to Mod Podge the cover to make it have my own personal touch on the outside of the book. However, I love Dr. Pepper so I wanted to keep it’s logo on my book. 🙂
My book  ended up having 24 pages in it. The perfect size for on-the-go sketching! I have started on my first doodle in the book! Check it out here.
There are definitely better tutorials out there on how to make homemade books than this one, but I wanted to share with you all my experiences with my latest project. Hope you guys enjoyed, and have a great week!
