With ORAS (Omega Ruby and Alpha Sapphire) coming out later this week, I am excited that I decided to create a Pokeball Cork board how-to craft first for this blog. It is just a lucky coincidence that it happened like this. A fun fact about myself: Pokemon Firered was the first game that I ever owned. Yes, I am a late bloomer when it comes to my gaming geekiness. That hasn’t stop me though, and here I am now creating crafts to help show-off that side of me. I was inspired to make this craft by watching one of my favorite youtubers Mortem3r, who created a do-it-yourself video a while back on a Zelda Cork Board DIY project.
Below is a step-by-step guide of how to create these DIY 8-bit cork boards. You can also watch Mortemer‘s video for the how-to details.
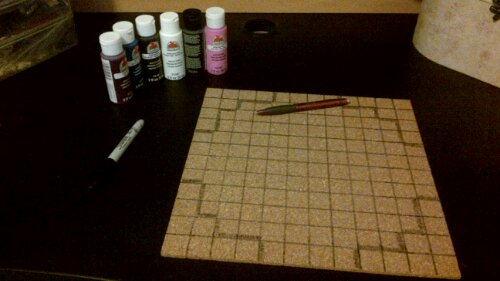
Supplies:
- Cork board
- Ruler
- Acrylic paint
- Paintbrush
- Pen/Sharpie
- Scissors
- Reference
Time: This honestly depends on how detailed you want your cork board to be. For me, it took about 6-8 hours to finish all four pokeballs.
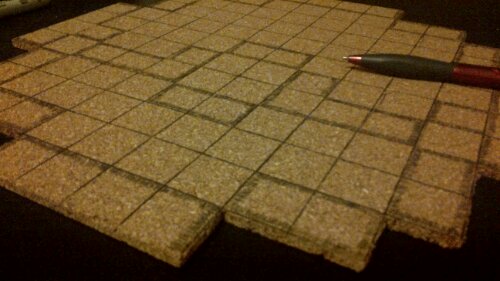
Step 1: Draw the Lines.
Depending on how detailed of a design you pick, you can usually make each pixel of these designs about a square inch. Using your ruler and writing utensil, put a dot on each inch on all sides of the cork board, as shown below.

Now you want to line up your ruler with the dots you put on parallel sides of the cork board and draw a line between them.
 Your cork board should now look like grid paper.
Step 2: Creating the shape.
Hopefully by this point you have decided what 8-bit design you want your cork board to look like. If not, that’s okay. Go ahead and take a break from crafting to do a quick search. I suggest looking up perler bead templates for it. There’s a board on my pinterest with a collection of these perler bead templates to help get you started.
Alright, so now that we have our image, it’s time to “trace it.” What I mean by this is that we will be making the lines thicker where we want to cut. You want to thicken the lines on one side, like shown below.
Step 3: Cutting.
This step is probably the easiest. Go ahead and cut the excess cork board you don’t want off with your scissors.
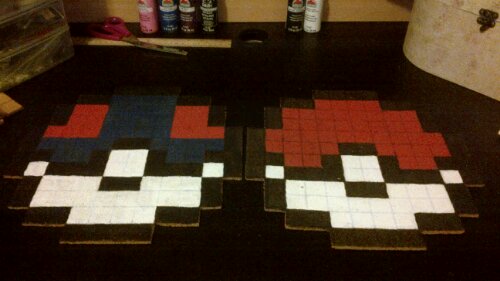
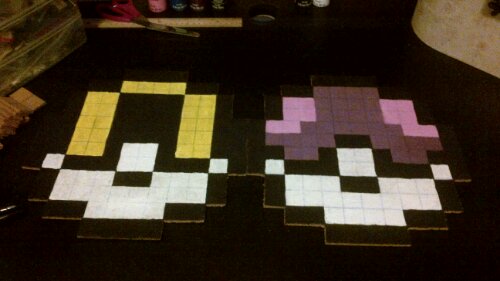
Step 4: Painting.
Now for the fun part. There are multiple ways to go about doing this part. One way, as Mortemer shown, was flipping the cork board over and eyeballing the painting. The way I did it was by painting over the grid lines that I used to cut. This is the what they ended up looking like all finished.
What I learned from this project:
- Acrylic paint does not hide sharpie or pen marks. I tried both ways just to see if the grid lines could be painted over. My final thoughts are that if you want your 8-bit cork board design to not have the grid lines, just flip over the cork board and paint on that side.
- The simpler the design, the better. If you tried creating a character out of these it could be difficult. However, if you had the cork board squared and then painted the character and a background on it, I’m sure that it would look great!
Edit: I finally put up my Corkboards!

Thanks forr a great read
LikeLiked by 1 person
Reblogged this on Boards and Crafts and commented:
Hi! This is the first craft I ever created to put on the internet! It’s moving from its original blog site because ArtsyRobotz is being made to focus on art projects. Meanwhile this site, Boards & Crafts, is being focused on the craft-y side of my life. So all projects are being transferred to make sure they stay on the internet to hopefully help anyone who would like to create these projects.
So please enjoy this flash back and may it help inspire your next project.
LikeLike